Friday, December 29

A few more sets to end 2023!

Hey, I want to show you some beads I made with a CiM - Creation Is Messy neutral opaque glass that came in the 2023 CiM Seconds bundle. I added some Glass Diversion frits to spice them up.

The first one, with Glass Diversions Sunglow frit.


The set below is the same base glass with Glass Diversions Orange Blossom frit. I don't see this frit on the website anymore, so it may no longer be available.


I find that the reaction of each of the frit is similar and I will have to test them again with another base glass to see if they create the same "autumn" hues.

I do like that these beads are bright and colorful in the midst of a gloomy winter day! 

#creationismessy 
#cimglass 
#glassdiversionfrit 
#pendragonfyre  
#handmade 
#handmadeincanada 
@creationismessy 
@nortel_glassgirl
@glassdiversionsfrit


Wednesday, December 27

New Tumble Etched Dragonscale Bead Sets

Hello, bead lovers! Today I want to share with you some of my favorite dragon-inspired beads. I have always loved dragons and their magical abilities, so I created these beads to reflect their beauty and mystery.

These beads are made with a special technique that gives them a textured and matte surface, like the scales of a dragon. They come in different colors and shapes, and each one has its own personality. I think they are perfect for making unique and whimsical jewelry pieces.
Do you like dragons too? 
What do you think of these beads? 
Let me know in the comments below!

The first set of beads is based on the idea of a green dragon with golden scales. 
I used Effetre Army Green opaque glass as the base and applied 99% fine silver foil on top.
Then I sprinkled some Val Cox Purple Rose frit over the silver and melted it all together. 


The result is stunning: the silver foil creates a shiny contrast with the green glass and the purple frit adds some depth and texture. The beads look like they have tiny golden scales that sparkle in the light. The spacers are pure Effetre Army Green glass.


The second set of beads is inspired by a pink dragon with metallic accents. I started with Moretti Tongue Pink opaque glass as the base and wrapped it with 99% fine silver foil. 


Then I added some rare Val Cox Purple Rose frit on top and melted it in. The effect is amazing: the silver foil forms a metallic layer around the pink glass and the purple frit creates a pattern of "dragon scales". 


The beads look like they have a delicate golden coating that reflects the light. 
The spacers are pure Moretti Tongue Pink.


I hope you like these dragon-inspired beads as much as I do. I'm sure Nortel has the best selection of glass for your projects. Jean & Jennifer will be very happy to have you as a new or returning customer!

Thank you for reading and stay tuned for more Pendragonfyre Tales adventures!

#effetrearmygreen
#morettitonguepink
#effetre
#nortel
#valcoxfrit
#99%finesilverfoil
#pendragonfyre
#handmade
#handmadeincanada
@nortel_glassgirl

Tuesday, December 26

Tumble Etched Glass Frit beads - 2 new sets!

Happy Holidays!
It has been an eventful few days but I wanted to drop a quick post to share a few new bead sets that will be going up on Etsy as of Jan 2nd.
Each of these sets are tumble etched to a tactile smooth finish.

This set of beads starts with a core of Effetre White opaque glass with an encasement of the clear transparent glass. A sprinkling of my Glass Diversions Spring Violet frit blend creates the amazing patterning of colors. 


This set of beads starts with a core of Effetre White opaque glass with an encasement of the clear transparent glass. A sprinkling of my Glass Diversions Peruvian Violet frit blend creates a patterning of colors that is soft and romantic.


Til next time!

D.

#creationismessy 
#cimglass
#lovesonnet
#effetresuperclear
#pendragonfyre 
#handmade 
#handmadeincanada 
@creationismessy 
@nortel_glassgirl


Sunday, October 22

Summer Has Gone and Cold Weather is Around The Corner - Where Has Pendragonfyre Been?

Wow how time flies!
My last post in early September seems like lifetime ago!

The past two months are months away from the studio filled with garden harvesting and a long awaited away break away from our busy lives.

This post will catch you up on all the adventures and over the next few posts I will be shared new items being added to my Etsy shop over the next while.


This year’s garden was a bit disappointing. Mother Nature was out of sorts and not a typical growing season. 
I am proud to grow everything from seed. No transplants in my garden.
Seeds that normal are very productive were not. Harvest times were not normal, so we made the best of less than desirable conditions.
As soon as my tomato plants moved from the greenhouse to the garden bed, a family of deer arrived to enjoy the tops of each plant. By only luck, the plants recovered and went on to produce tomatoes.
The productive parts of our garden were potatoes, squash,  hot peppers and tomatoes, even though they were less than previous years production.


The productive parts of our garden were potatoes, squash,  hot peppers and tomatoes, even though they were less than previous years production.

We harvested our garden before frost hit and now my dining room and a spare bedroom have become indoor ripening stations! 


A special thank you to my son for his monitoring of our produce as we caught a flight out of Canada for a 13 day road trip adventure to the southwest USA.

This was our first trip since the dreaded covid halted travel. Our usual destination of choice is Wyoming/Montana which I deem my “happy place”. Over the past few years, these states have been filled with Yellowstone TV series fans, so for 2023 we took a different approach and decided to visit new locations and add new USA states to our list of destinations.

Here are a few highlights!
We flew from the east coast of Canada to Calgary, Alberta and on to Las Vegas!  


Neither of us are gamblers, so we opted to stay away from the “strip” so that we could be mobile.
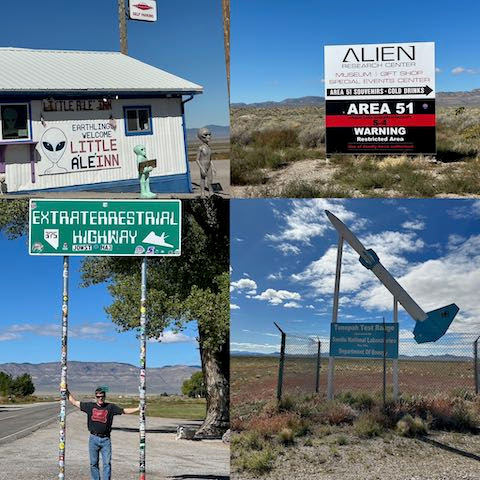
We visited Lake Mead and Hoover Dam, Red Rocks National Park, Area 51.


We did spend part of a day visiting Las Vegas taking in lunch at Gordon Ramsey Burger 


and exploring the Conservatory at the Belaggio. 


The Conservatory a free activity that is updated each  season with displays made of flowers. The theme was Enchanted Garden and it was beautiful. 

There is also a beautiful display of glass on the ceiling of the Bellagio.


From Nevada we headed to California to see Los Angeles, Santa Monica, Palm Springs and the Coachella valley. 
Beautiful area and I took the liberty to fit in a few sites from the novels of my favourite author, Michael Connelly. 


After reading his Bosch series, I felt comfortable with the area of Los Angeles visiting Griffith Observatory, Angel’s Flight and to the end of Route 66 at the Santa Monica pier.


From California, it was time to head east to Arizona. 


We stayed east in Mesa and this was our home base of day trips to Sedona, Grand Canyon East and South Rims and Tucson.


In Tucson, I tried to locate the address for Beads Of Courage, however our Apple Navigation directed us to an older address (Beads of Courage needs to update this!) and as a result, time did not permit us to visit their current location. Maybe next time.😊

We did spend time at Kent's Tools Jewelry & Lapidary Tools & Supplies He has lapidary and jewlery supplies in a lovely spot to explore. I indulged in a few new tools for my studio.
I recommend visiting their website or Etsy store. They have SO MANY tools and the staff was very friendly and helpful!

The rental car, a Jeep Compass, was put through its paces covering 2906 miles (4649 km) and after 13 days away, I was very happy to sleep in my own bed!
I am still recovering from some elevation sickness due to all of the travelling we did up and down mountains, but there is no fun in sitting still!

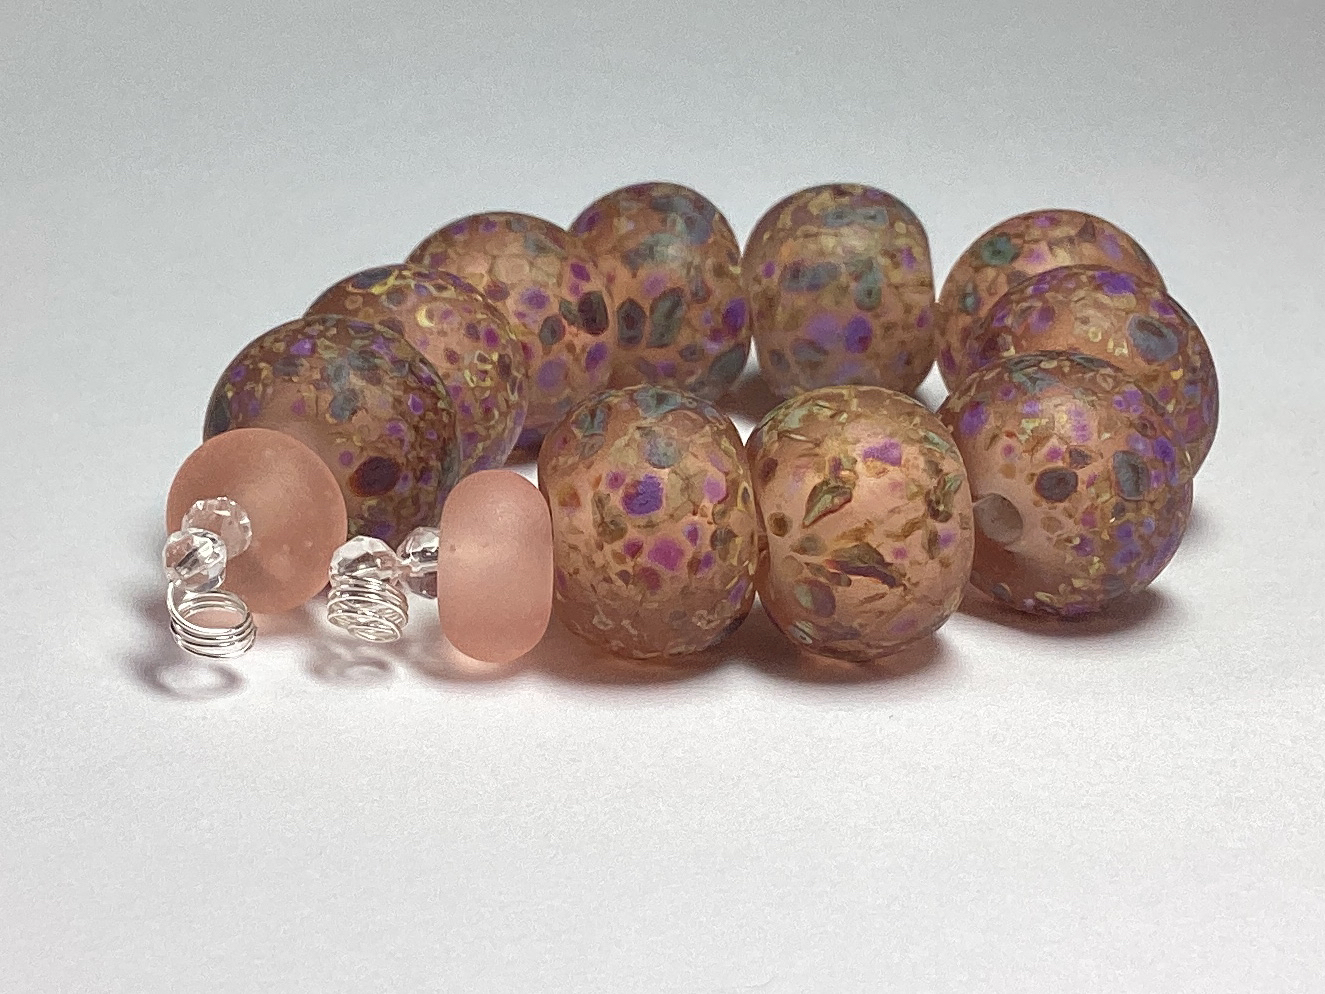
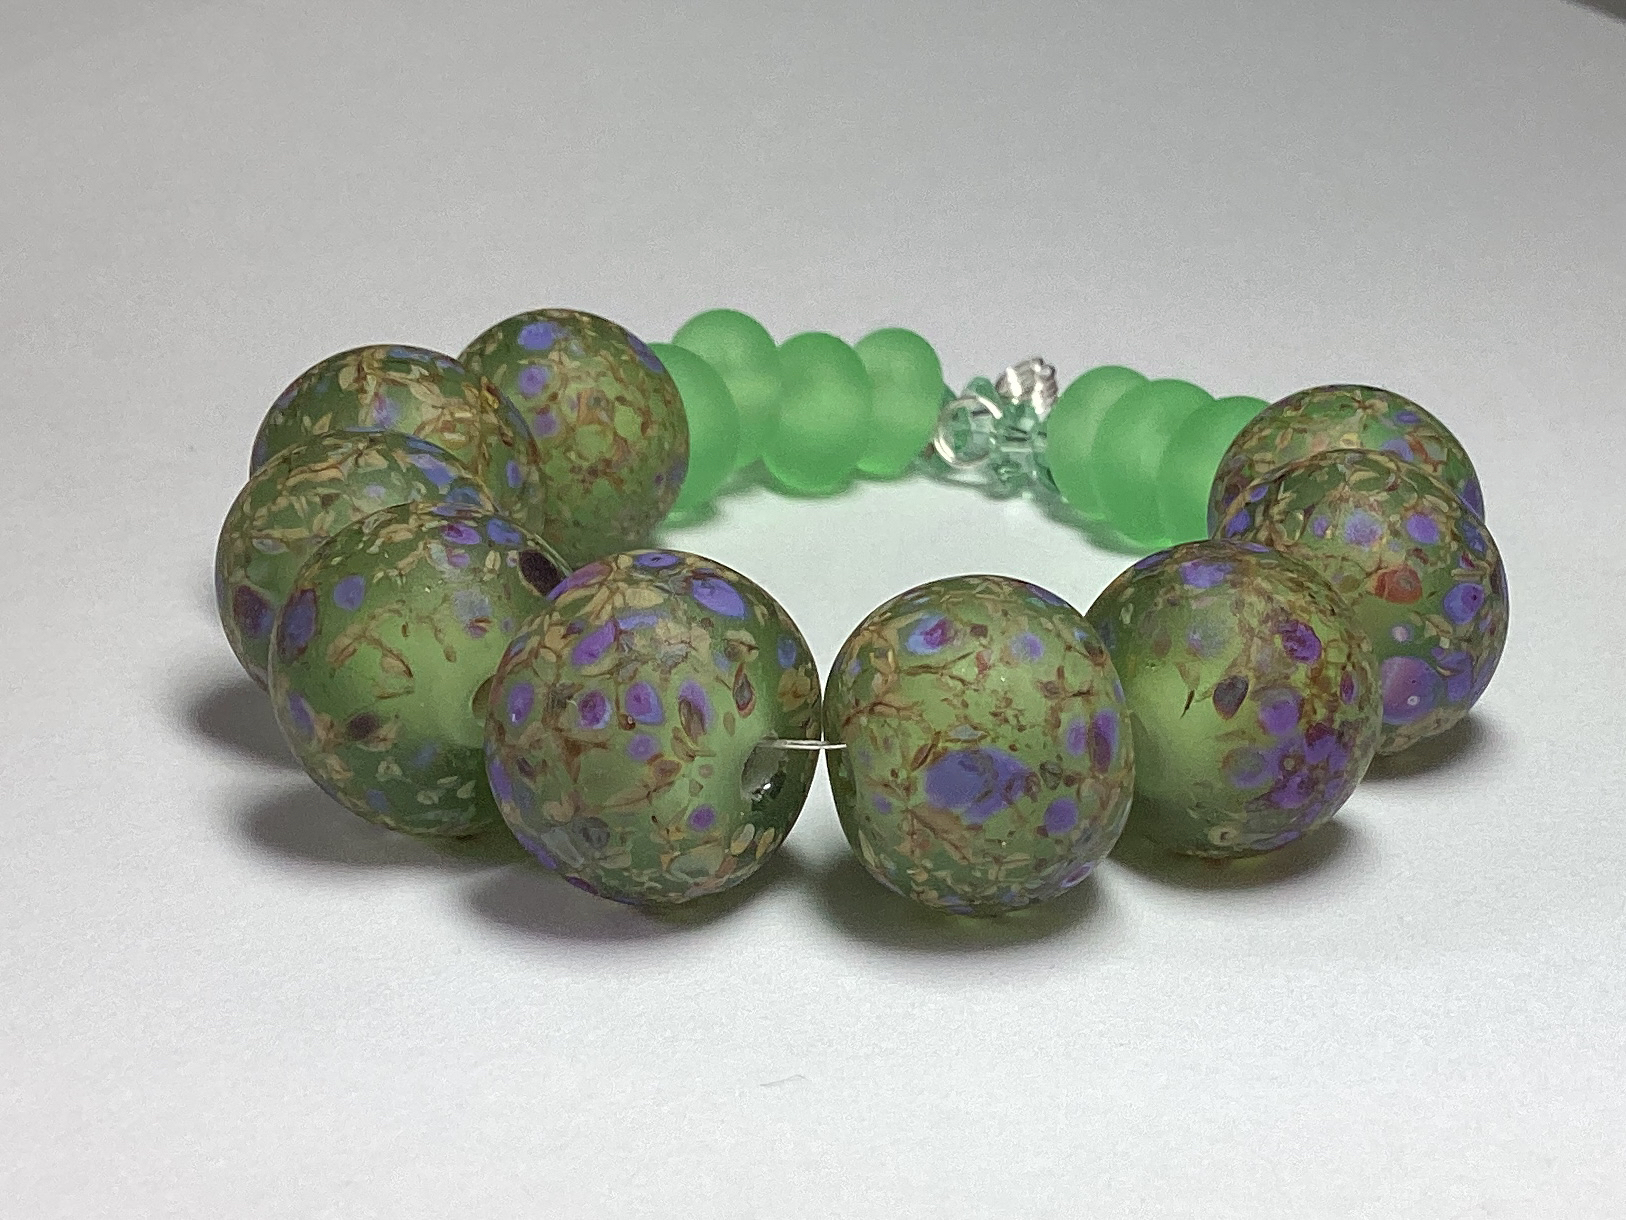
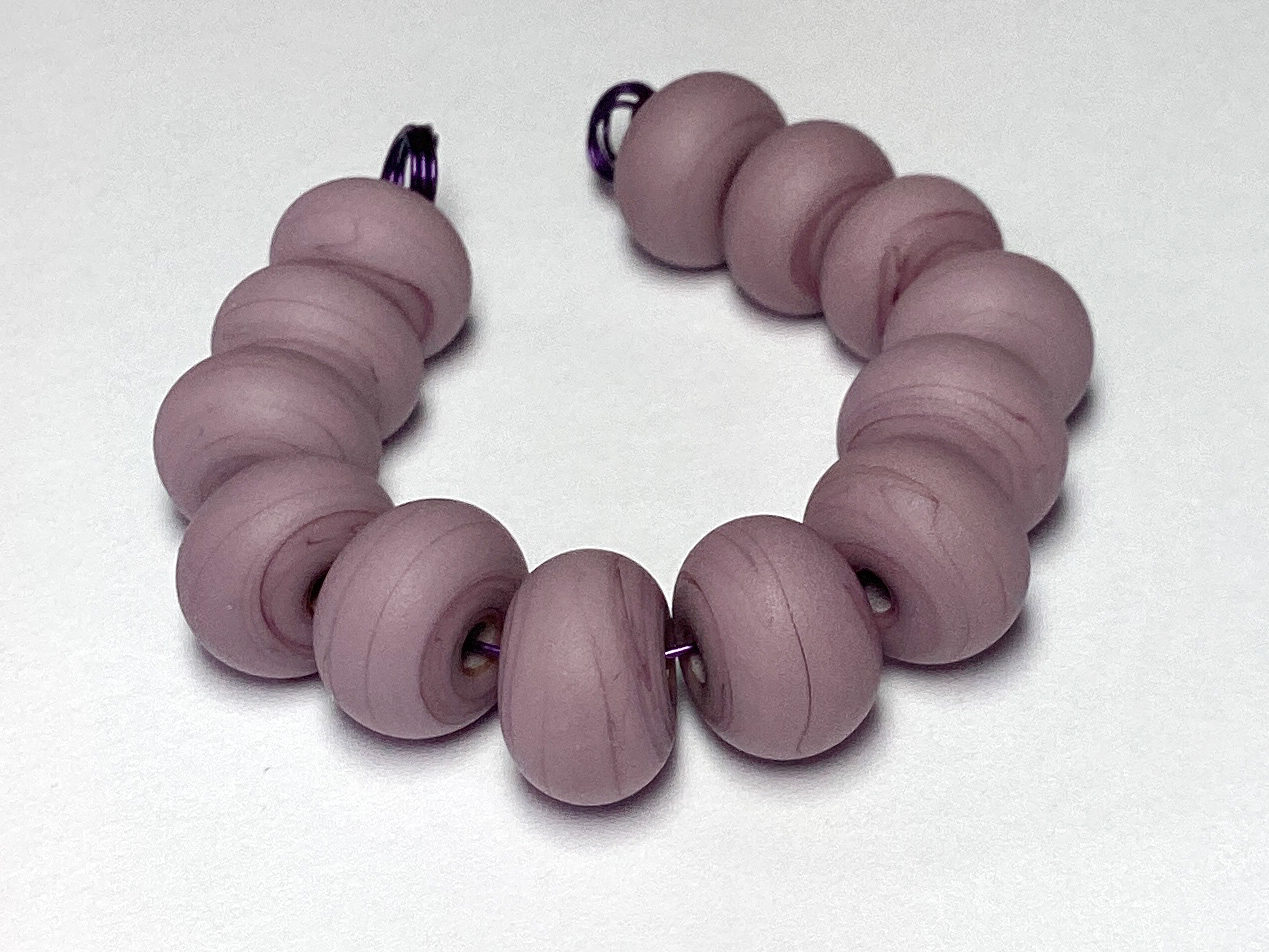
Looking forward to getting back at the torch and in the meantime, visit my Etsy as there are lots of bead sets and more to come!

Til next time!
D.

Monday, September 11

Etsy Restocks of Love Sonnet Bead Sets!

Love Sonnet beads were popular over the last month. 
Thank you to my clients for you purchases!

Below are the newest Love Sonnet offerings available in my Etsy shop.

Each set of beads starts with a core of Effetre White opaque glass with an encasement of the transparent glass. A sprinkling of my own Pendragonfyre frit blend creates the amazing patterning of colors.

The frit beads in this set were created with the encasement layer of Effetre Pale Blue #050, a transparent light blue.


The frit beads in this set were created with the encasement layer of Effetre Super Clear #006, that when tumbled transforms to a soft white hue.


The frit beads in this set were created with the encasement layer of Effetre Rose #058, a transparent pink with a peachy hue. 


The frit beads in this set were created with the encasement layer of Effetre Pale Emerald #031, a transparent gemstone green transparent glass.


The frit beads in this set were created with the encasement layer of Effetre Pale Aquamarine #038, a transparent aqua blue green glass that is lovely when tumbled.


The frit beads in this set were created with the encasement layer of Effetre 14K #713, a transparent golden yellow transparent glass that is lovely when tumbled.


The frit beads in this set were created with the encasement layer of Effetre Rose Quartz #067, a transparent pink. 


The frit beads in this set were created with the encasement layer of CiM - Creation is Messy medium blue transparent similar to Robert E, this was part of the recent CiM Second's bundle released earlier this year.


Such a difference the tumbling makes.It is important to note that the transparent glasses in most of these sets was the palest of the color range available in my glass stash.

I am not certain on the current availability of these transparent glasses so please reach out to Jean or Jennifer at Nortel to add some of these glasses to your next glass order.
I am sure they can suggest other options if need be as I hope to be able to order additional glasses for my Love Sonnet sets in the future.


#creationismessy 
#cimglass
#lovesonnet
#effetrepaleaquamarine
#effetrepaleblue
#effetrerose
#effetrerosequartz
#effetrepaleemerald
#effetresuperclear
#effetre14K
#pendragonfyre 
#handmade 
#handmadeincanada 
@creationismessy 
@nortel_glassgirl


Sunday, September 10

Sunday Round Up - Tumbling Effetre Opaque Glasses

Today's post is showing three sets of Effetre opaque round glass bead sets that have been tumbled to create a natural stone like finish. 
Many jewelry designers will use these with semi precious stones to create a mixed media design.
I do not use etching chemicals as I prefer a more natural process and do not like to have harsh chemicals in my studio.

Tumbling is a process of polishing or smoothing objects by placing them in a rotating barrel with abrasive media, such as sand, grit, or ceramic pellets. 
The friction and impact of the media against the objects gradually wears away the surface, creating a smooth or shiny finish. 
However, if the objects are made of glass, tumbling can also create an etched effect, because the abrasive media removes the glossy layer of the glass and exposes the underlying layer, which has a different refractive index. 
This makes the glass look less transparent and more opaque, giving it a soft and velvety appearance.

First up, Effetre Sage Green #211 opaque glass is a type of glass that has a smooth and uniform surface, with a rich and deep green color. 


It is made by adding copper oxide and iron oxide to molten glass, which gives it its opacity and hue in tones of green and brown.


Next is a favourite Effetre base glass that most beginner bead makers use for practice beads - Light Turquoise opaque # 232. 
A simplicity in its blue green color allows it to be used in so many types of designs. 


As it has so many traits of reactivity with other glasses, I sometimes like to create simple rounds to really show off the color.


Finally, Effetre Violet #272 opaque glass has a vibrant, rich deep purple color. 
These spacers are small enough to fit in between other beads or wirework, but not too small that they disappear. 


They are perfect for creating necklaces or bracelets with a variety of styles and colors.


These glasses are all very affordable and available at Nortel Glass in Toronto for less than $30 CAD a pound (based on their current online shopping portal). Reach out to Jean or Jennifer at Nortel to add or restock some of these glasses to your collection.

#Beadwork 
#SpacerMaking 
#JewelryMaking 
#JewelryDesign 
#Beads 
#Beading 
#Crafting 

#DIYJewelry
#Handmade
#effetre
#nortel
#pendragonfyre
#handmade
#handmadeincanada
@nortel_glassgirl

Thursday, August 3

Measuring Handmade Lampwork Beads - How Do You Measure Yours?

Due to the extraordinary heat that we have been dealing with this summer, today's post speaks to different subject that every bead maker has encountered after the beads emerge from the kiln.

A few Sundays ago when I was spending my torch session making over 200 spacers, it took quite some time to remove them from their mandrels, clean it hole and group them for common bead sizing (hole to hole).

When I post beads for sale, I like to measure the beads and note the range in measurement from small to large so that jewelry makers have specific measurements to use in their planning of a new design.

Someone reached out to ask me how I measure my beads to be so exact in my millimetre sizes.

Answer: I use a handy digital calliper. These are available for purchase at some hardware stores or online.

A set of calipers are a tool that can measure the diameter, thickness, and length of an object with precision. 


Here are the basics of its use.
  • Turn on the digital calipers and set the zero point by closing the jaws and pressing the zero button. If you are using an analog calipers, align the zero mark on the scale with the needle.
  • Hold the bead in one hand and gently open the jaws of the calipers with the other hand. 
  • Place the bead between the jaws and close them until they touch the bead lightly. Do not squeeze the bead or apply too much pressure, as this may damage the bead or affect the measurement.
  • Read the measurement on the display or scale of the calipers. This is the diameter of the bead at its widest point. 
    • You can also measure the thickness of the bead by placing it between the smaller jaws at the end of the calipers. 
    • To measure the length of the bead, use the depth gauge at the bottom of the calipers and insert it into the hole of the bead.
  • So I created a quick template to assist me in sorting the beads into groups by size.
  • I measure each bead and place them in the grid based on the recorded size in millimetres.
  • As I usually measure many beads within the same stringing session, I have found that beads can fall within the same range of measurement... with a few outliers. 

Based on the grouping of the sizes, I then choose the beads to include in my string of wire for photographing and posting on my Etsy online shop.


Any outliers go into my "bead soup" bottle for a future offering of orphan beads so nothing goes to waste!

Measuring your lampwork beads with a caliper can help you ensure quality, consistency, and accuracy in your bead making or collecting. It can also help you create beautiful jewelry designs that fit well and look great.

My latest sets of spacers are now posted and available for purchase in my Pendragonfyre Etsy Shop. 

#Beadwork 
#Beadspacing 
#SpacerMaking 
#JewelryMaking 
#JewelryDesign 
#Mandrels 
#Beads 
#Beading 
#Crafting 
#PrecisionMeasuring
#AccurateMeasurement
#DigitalCaliper
#MeasurementTool
#DIYJewelry
#Handmade